Reflection Probes
Often it is undesirable for objects to simply reflect the Skybox in a Unity scene. In many instances, objects may be blocked or ‘occluded’ from the sky. They may be indoors or underneath an architectural feature like a bridge or tunnel . To create more accurate reflections we need to sample what objects ‘see’ using a ‘Reflection Probe’. These probes render the world from their position in 3D space and write the results to a cubemap. This can then be used by nearby objects to give the impression that they are reflecting the world around them.
A reflection probe can be added via (GameObject>Light>Reflection Probe).
The position of a Reflection Probe will determine what the generated cubemap looks like, and therefore what is ‘seen’ in the reflections. Generally, for performance reasons it is better to use as few probes as possible. Remember, reflection probes are not meant to give physically accurate results, but instead give the impression of reflections in the game world. A few well placed probes throughout your scene will be sufficient in most cases.
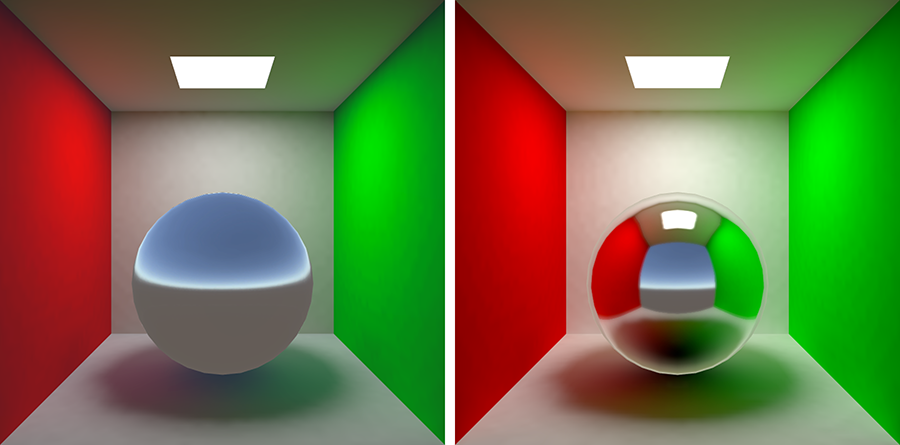 Left: Our scene with default reflections. Right: With a Reflection Probe added.
In the Inspector panel for a Reflection Probe we can set the ‘Type’ property of the probe to choose between ‘Baked’, ‘Custom’ or ‘Realtime’. It should be noted that Realtime Reflection Probes are extremely detrimental to performance as we are effectively rendering the scene an additional 6 times for each probe. There are specific cases where a realtime reflection probe is required and this expense is justified, but as a general rule, Baked Reflection Probes are preferable as they are considerably more performant.
Note that GameObjects are only visible to Baked Reflection Probes if marked as ‘Reflection Probe Static’ from the ‘Static’ drop-down at the top of the Inspector panel. Conversely, ‘Realtime’ probes render all visible GameObjects in the world unless a culling mask is applied.